Internal gutter systems play a crucial role in safeguarding your home’s foundation by directing rainwater away from the building. Over time, however, these systems can wear out or become inefficient, potentially leading to leaks, water damage, and costly repairs. Understanding when and how to replace your internal gutters is essential for maintaining a well-functioning home. This guide walks you through the key considerations for internal gutter replacement, helping homeowners make informed decisions.
What Are Internal Gutters?
Internal gutters are a specific type of rainwater drainage system built inside the structure of a building, typically hidden within the roofline. Unlike external gutters, which are visible from the outside of the building, internal gutters are integrated into the roof design, directing rainwater through the house to downspouts.
One of the main benefits of internal gutters is that they can offer a cleaner, more streamlined look for your home’s exterior. However, they require more careful maintenance since they are less accessible than external systems.
Why Do Internal Gutters Need Replacing?
Internal gutters can face several issues over time, leading to the need for replacement. Below are some common signs that it might be time to replace your internal gutter system:
1. Water Damage or Leaks
One of the most obvious signs that your internal gutter system is failing is the presence of water leaks. If you notice water stains on your ceiling, walls, or floors, this could indicate that the gutters are no longer functioning properly, allowing water to seep into the building.
2. Sagging or Uneven Gutters
Internal gutters are designed to slope slightly to allow water to flow towards the downspouts. However, over time, the weight of debris, standing water, or the natural settling of the building can cause the gutters to sag or become uneven. This will disrupt the water flow and lead to water pooling in certain areas, which may cause further damage.
3. Clogs or Blockages
Internal gutters are often more difficult to access for cleaning, making them more susceptible to blockages caused by debris like leaves, twigs, or even moss. If clogs are not addressed, the water may overflow, leading to potential leaks and damage.
4. Rust and Corrosion
Depending on the materials used, internal gutters can be prone to rust and corrosion over time. If the gutter material has begun to degrade, it may start to develop holes or cracks, which can cause water to leak into the home.
How to Replace Internal Gutters: A Step-by-Step Guide
If your internal gutters are showing signs of damage or wear, it’s important to act quickly. Replacing internal gutters is not a DIY project for most homeowners due to the complexity and accessibility issues. Here’s an outline of what you can expect during the replacement process.
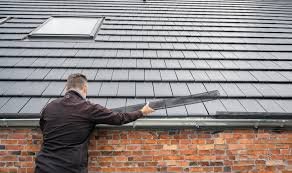
1. Assessment and Inspection
The first step is to inspect your gutters thoroughly. Look for signs of damage, wear, and improper slope. You may also need to hire a professional to assess the condition of your gutters, especially if you can’t easily reach them.
2. Choosing the Right Materials
When it comes to replacing internal gutters, you have a few material options, including aluminum, PVC, or galvanized steel. Each material has its own pros and cons, such as durability, maintenance requirements, and cost. Choosing the right material is essential for the longevity of your new gutter system.
3. Removing the Old System
Once you’ve chosen the right materials, the next step is to carefully remove the old internal gutters. This can be a challenging task due to their position within the roof structure, so it’s best left to professionals who have the tools and experience to do so safely.
4. Installing the New Gutters
The new internal gutters will be installed in place of the old system. This involves attaching the gutters securely to the roof, ensuring proper slope for drainage, and connecting them to the downspouts to direct water away from the home’s foundation.
5. Final Inspection
After installation, a thorough inspection should be conducted to ensure the gutters are working efficiently and that all connections are secure. The gutters should be checked for any leaks, proper water flow, and ease of access for future maintenance.
Key Considerations When Replacing Internal Gutters
Replacing internal gutters is a significant investment, so it’s essential to make informed decisions. Here are some key factors to keep in mind during the replacement process:
- Cost: Internal gutter replacement can be costly, depending on the size of your property and the materials chosen. It’s important to get multiple quotes from reputable contractors to ensure you’re getting the best value for your investment.
- Maintenance: Even after replacement, regular maintenance is crucial to keep your internal gutters functioning properly. Consider scheduling annual inspections and cleaning to prevent future clogs or damage.
- Hiring a Professional: Replacing internal gutters is a complex task that requires expertise. It’s always recommended to hire a licensed contractor with experience in gutter replacement to ensure the job is done correctly.
Conclusion
Internal gutter replacement is an important home improvement task that helps maintain the integrity of your building’s structure. By understanding the signs of damage and following the proper steps for replacement, you can ensure that your gutters continue to perform efficiently for years to come. Don’t wait for a small issue to turn into a bigger problem—schedule a professional inspection to assess the condition of your internal gutters today.